If you already use DocuSign — or your brokerage requires it — ReadyToSign integrates directly. You connect your DocuSign account once, then send tagged packages straight from ReadyToSign with every field and signer transferred automatically.
This tutorial focuses on what’s different about the DocuSign flow. The send review screen, status tracking, and downloads work the same as in Tutorial 3 — Send for signature with BoldSign, so we’ll move quickly through the shared parts and zoom in on the DocuSign-specific steps.
1. Pick DocuSign on the send screen
Start the same way as a BoldSign send:
- Open your tagged package on the dashboard.
- Click Send for signature.
- On the service picker, select DocuSign and click Continue.
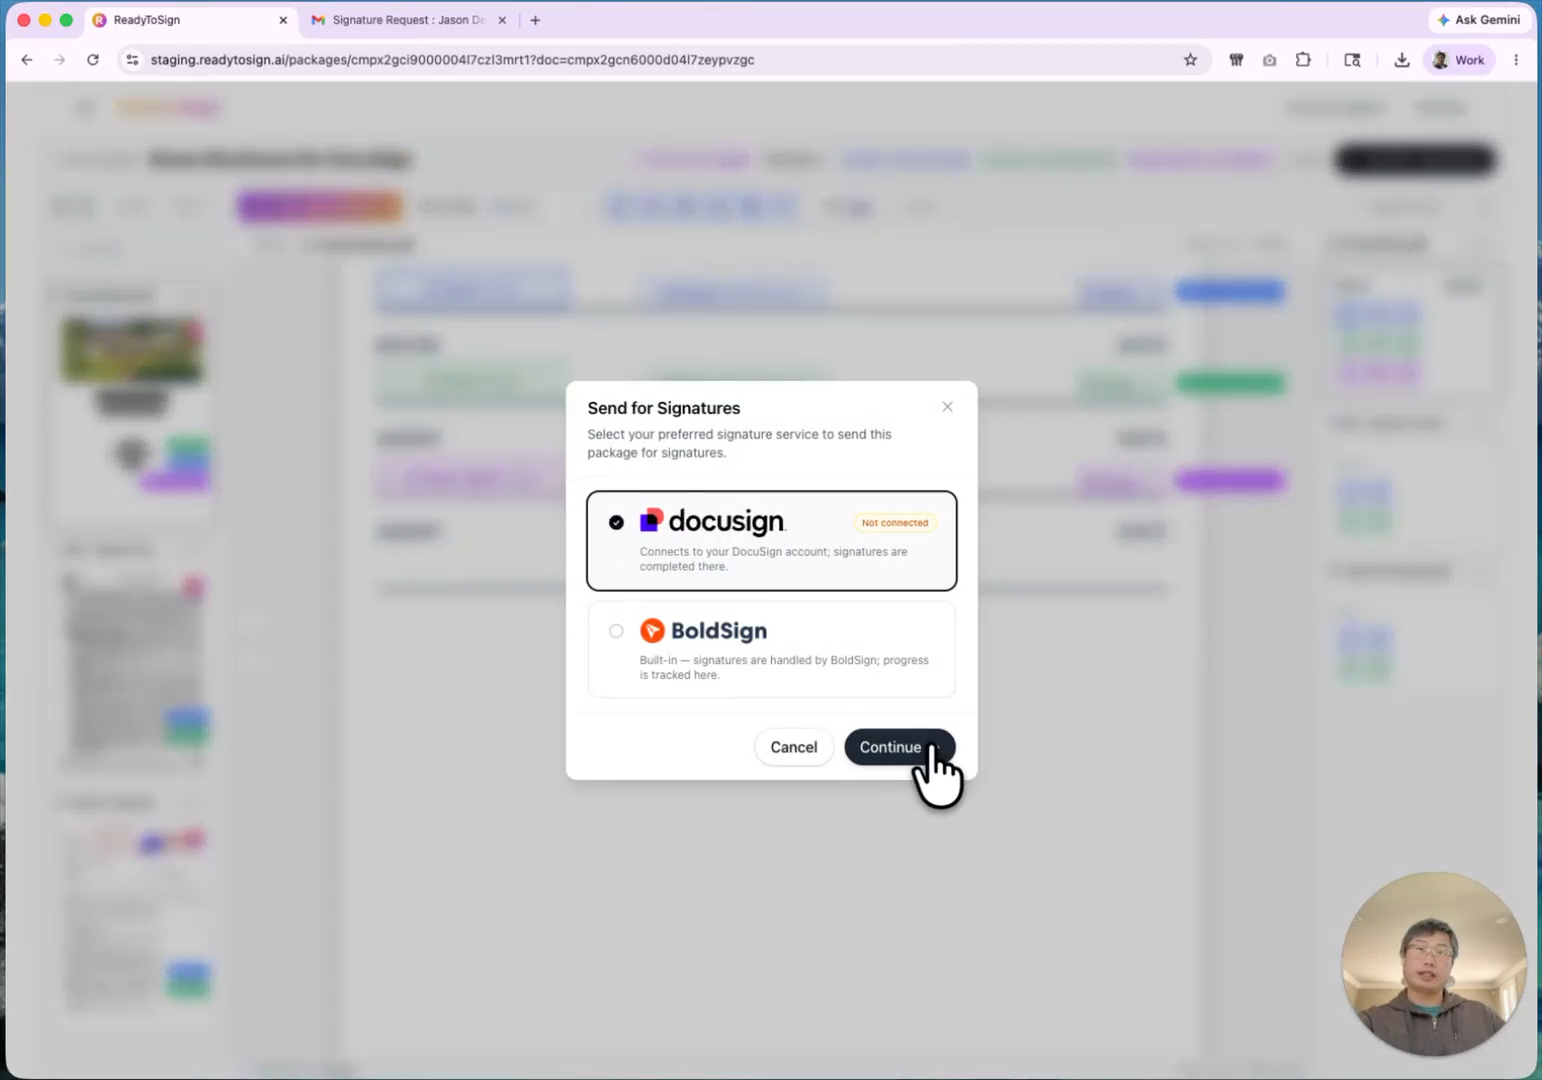
If you haven’t connected DocuSign yet, ReadyToSign asks you to link an account.
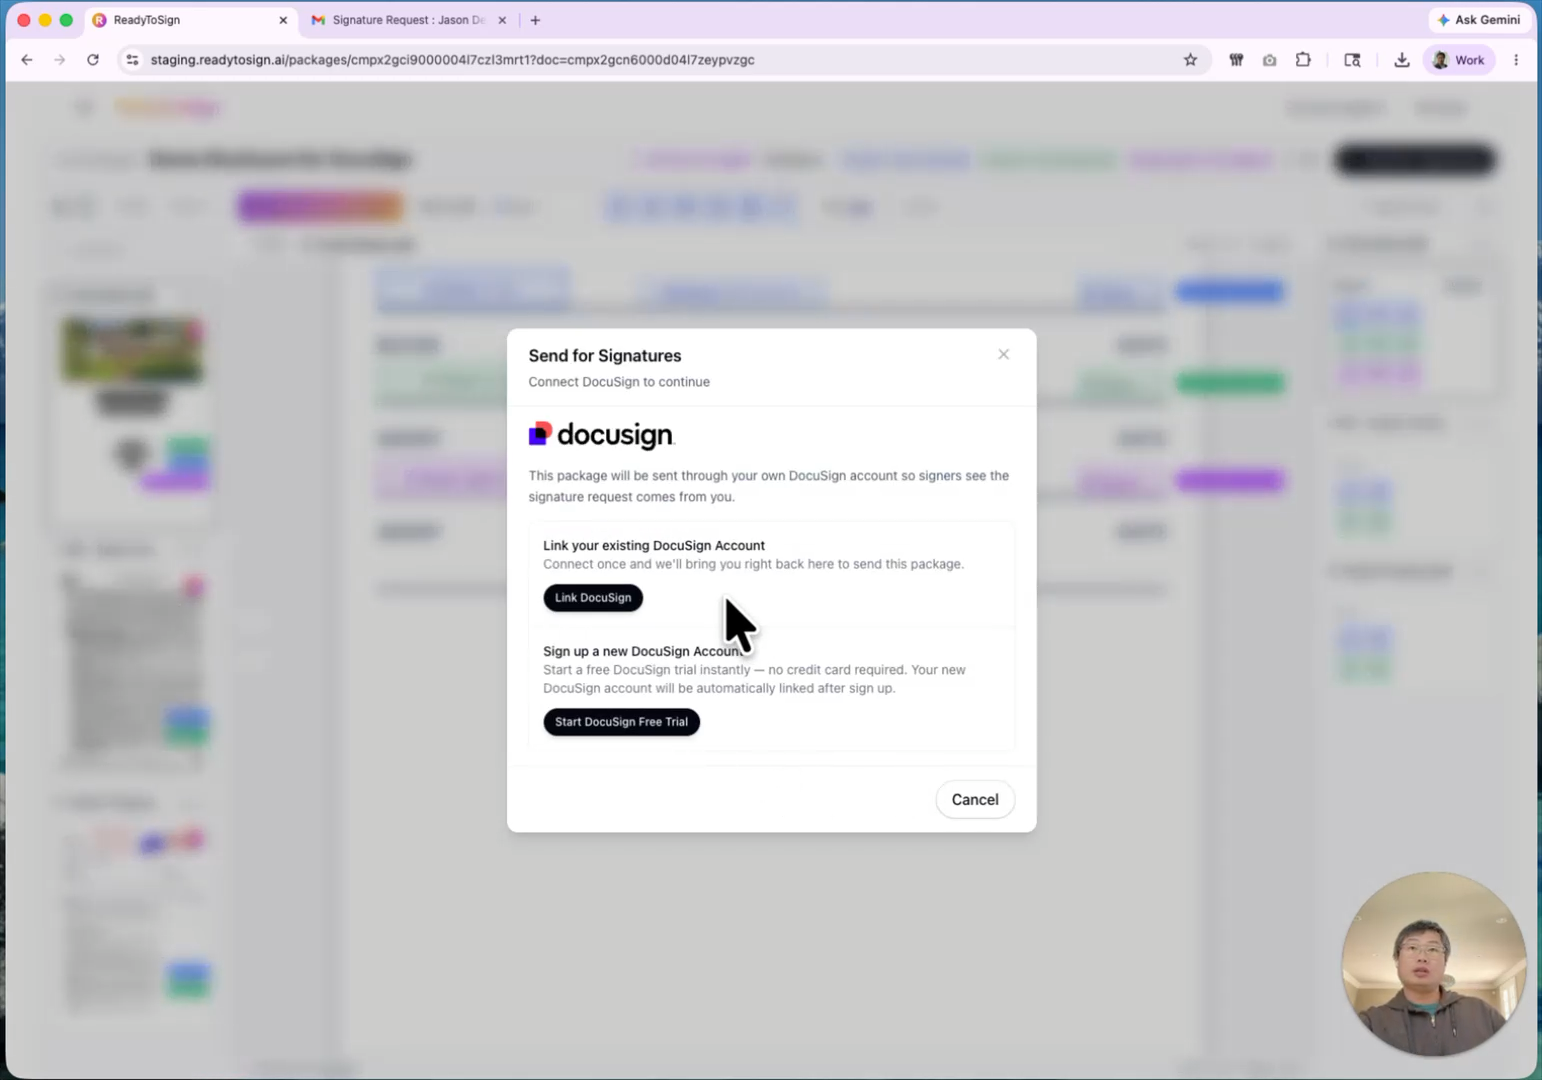
2. Link your DocuSign account
You have two options:
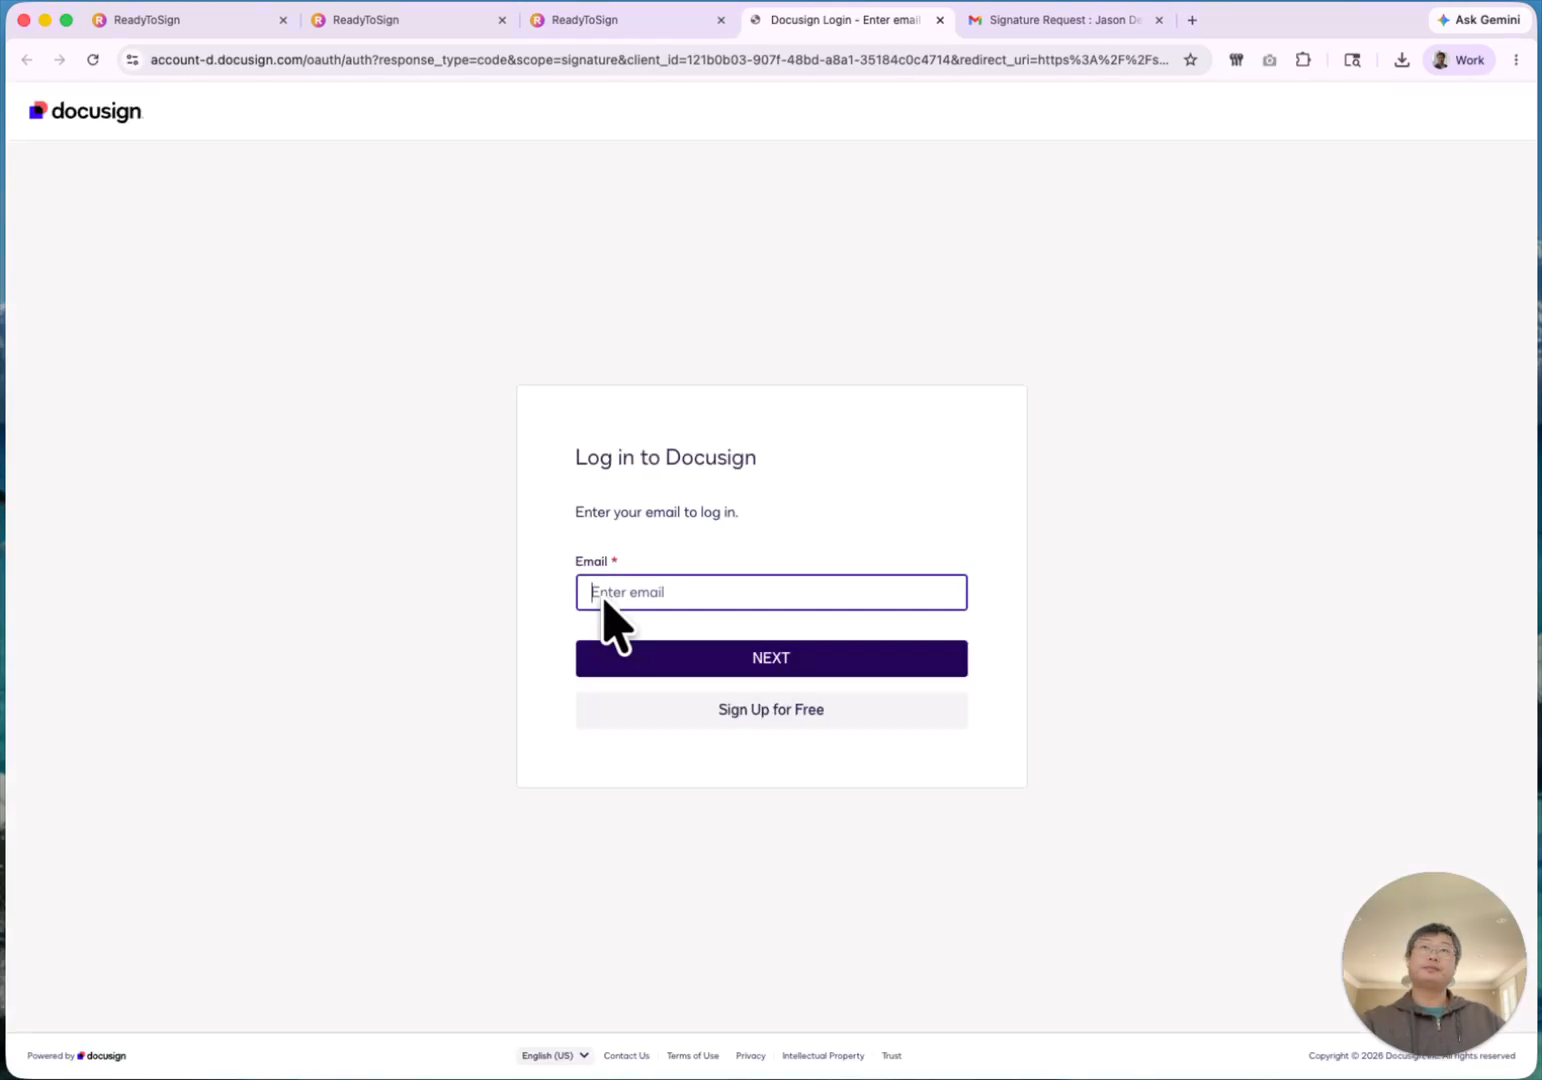
Already have DocuSign. Click Link DocuSign. You’ll log into your DocuSign account in a pop-up, and ReadyToSign confirms the link as soon as it completes. After this, ReadyToSign can transfer documents, signature locations, and signer roles directly into your DocuSign account.
No DocuSign account yet. Click Sign up for DocuSign. DocuSign’s sign-up form opens with your name and email already filled in— just add your phone number to complete it. The new account links to ReadyToSign automatically.
3. Review and send
After linking, ReadyToSign drops you on the send review screen. This is the same review screen as the BoldSign flow:
- Sender — verify your name and email.
- Recipients — confirm signers and emails.
- Custom message — optional note included in the signing email.
- Documents — every file in the package, ready for DocuSign.
Check the “I’ve reviewed the AI-tagged fields” box before sending.
Direct send vs review in DocuSign first
There’s one DocuSign-specific option on this screen:
- Direct send (box unchecked) — ReadyToSign sends the envelope to your recipients immediately.
- Review in DocuSign first (box checked)— ReadyToSign exports the envelope to your DocuSign account as a draft. You finish reviewing and click send from inside DocuSign.
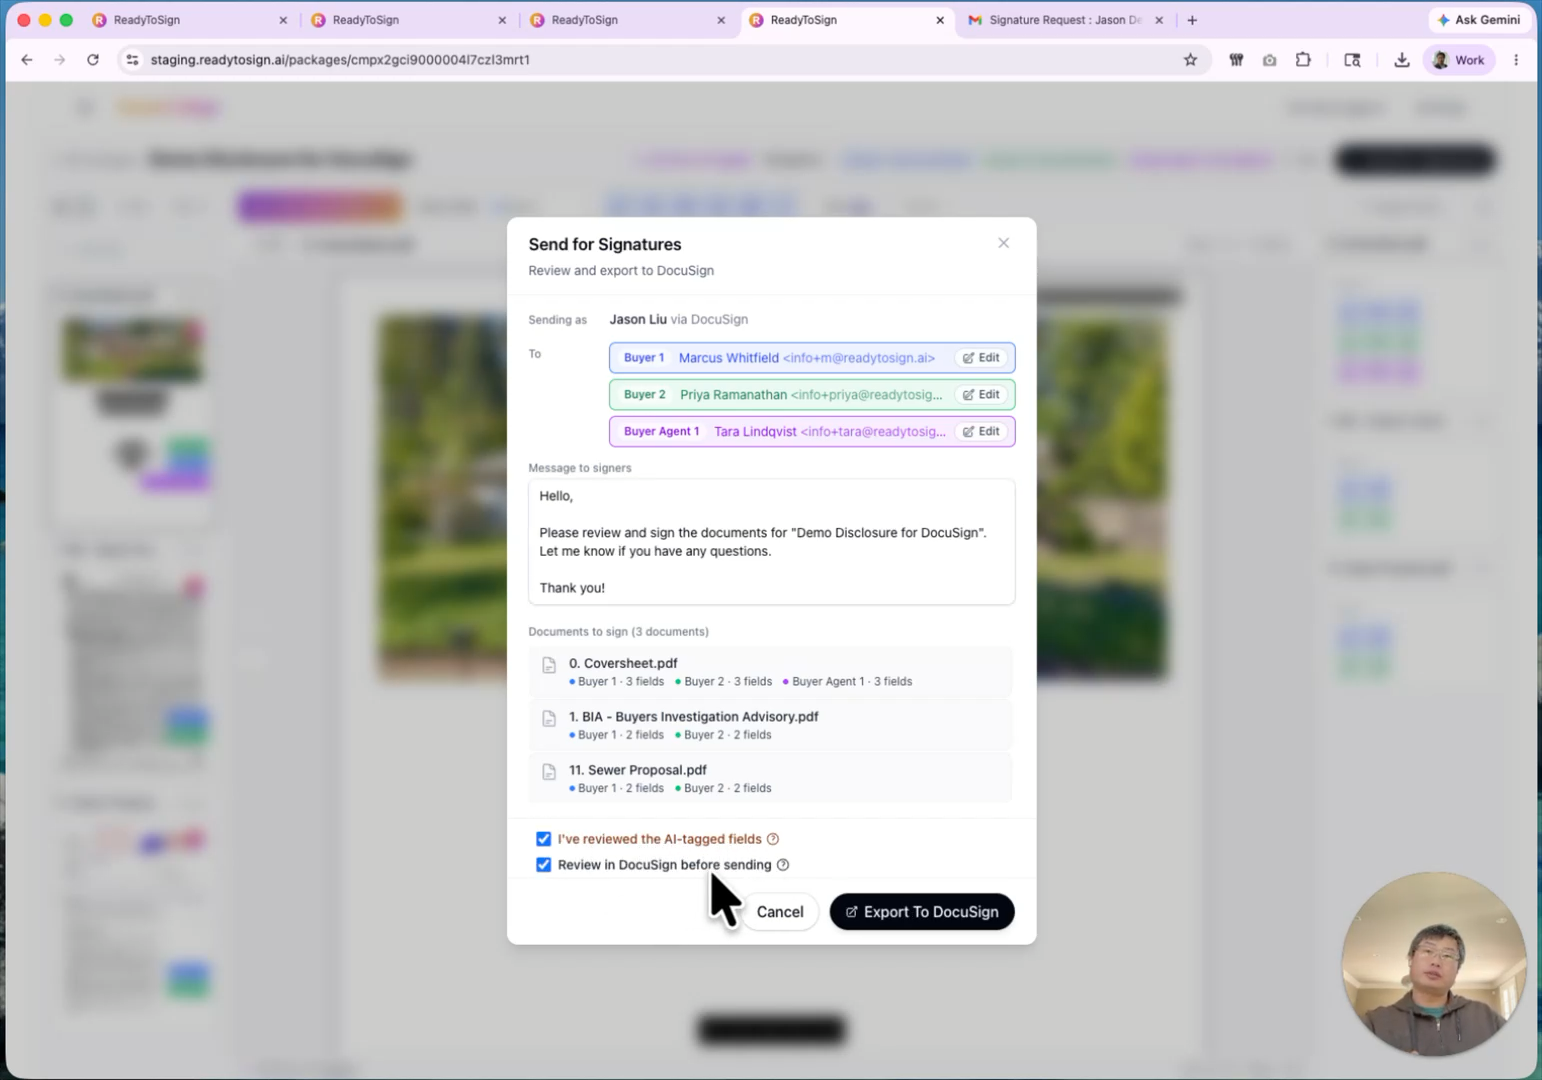
Use review first if you need to add anything DocuSign-specific (custom branding, advanced routing, conditional fields). Use direct send for the simple case.
For this tutorial, leave it unchecked and click Send.
4. What happens behind the scenes
ReadyToSign uploads the documents to DocuSign and prepares the envelope with all the AI-tagged signature locations and roles in place. It takes a few seconds. Once it’s done:
- The envelope is sent (or saved as a draft if you used “review first”).
- A confirmation appears in ReadyToSign with two action buttons: Refresh status and Open in DocuSign.
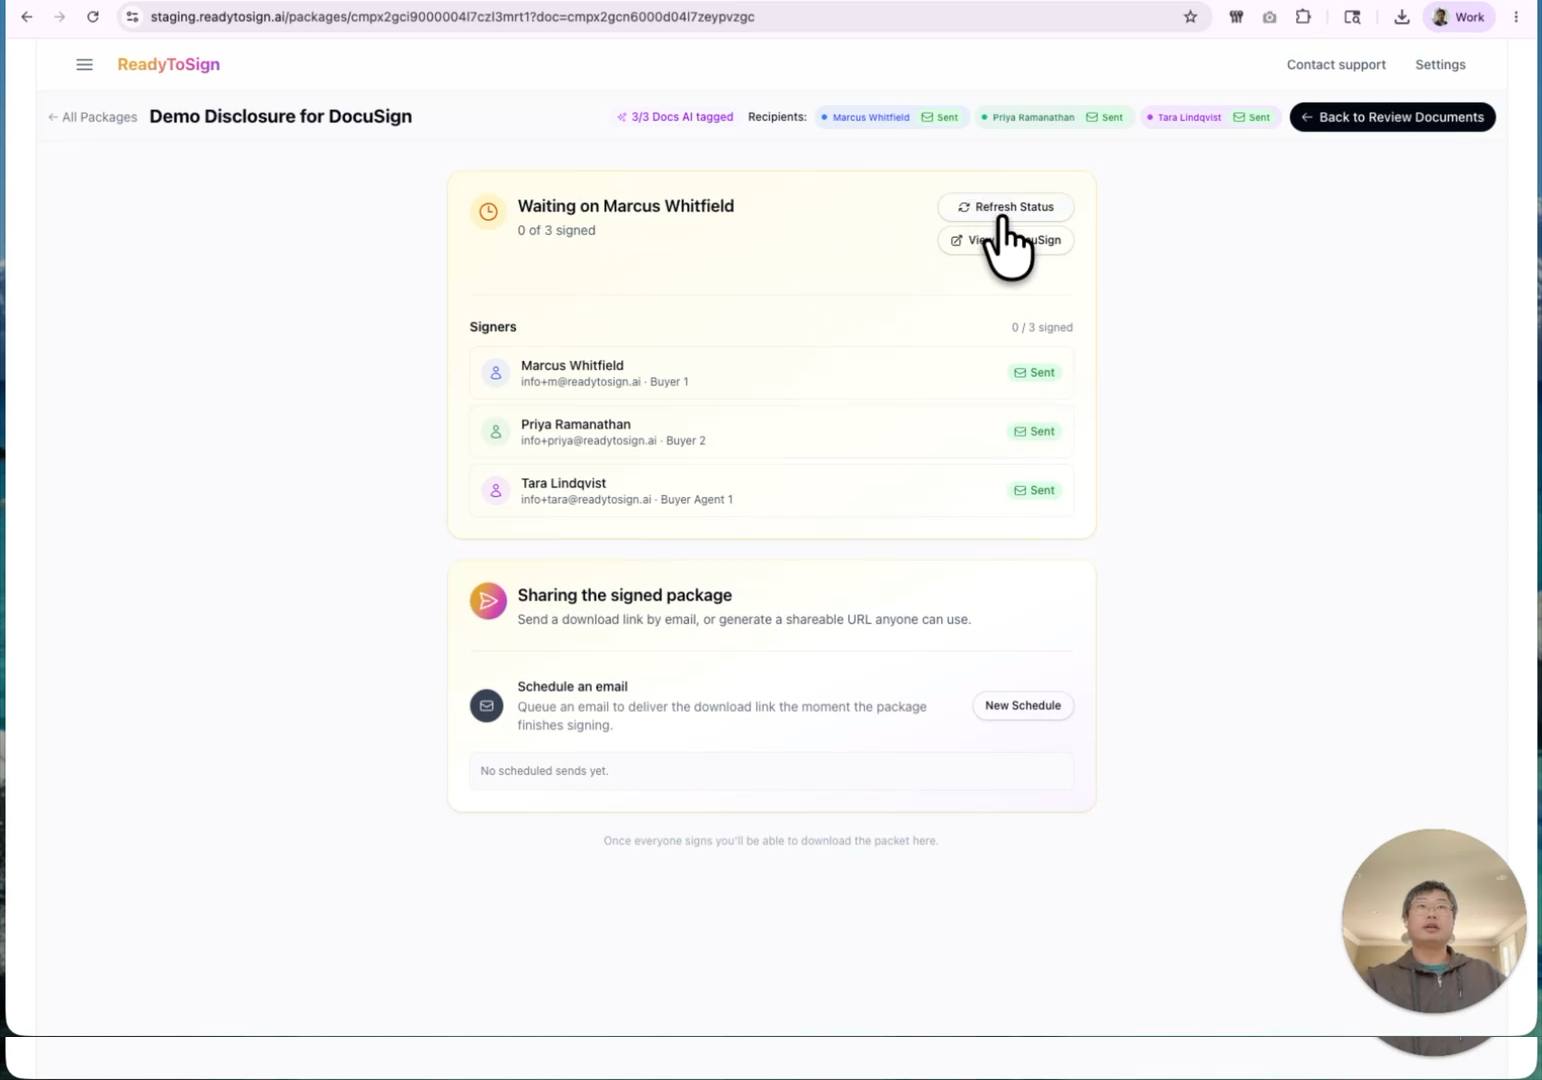
5. Track status across both apps
You can manage the signing process from either side:
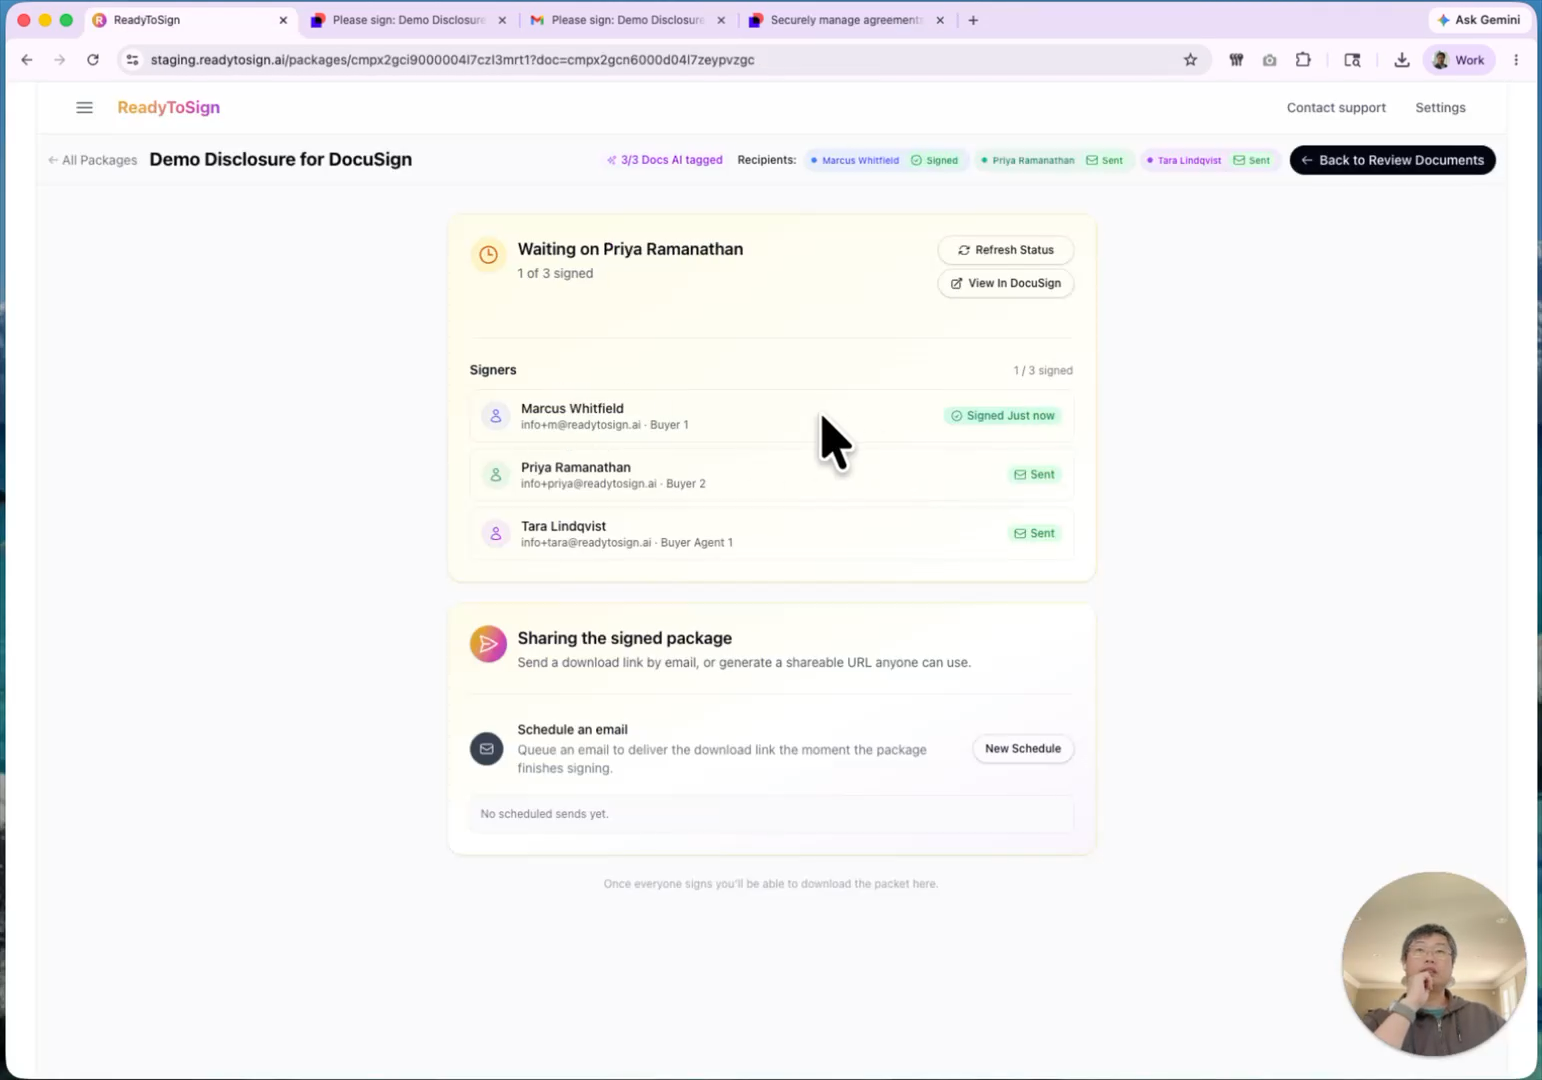
From ReadyToSign. Your dashboard shows the same signature status page as a BoldSign send — per-recipient signed/pending state, timestamps, and a completion banner.
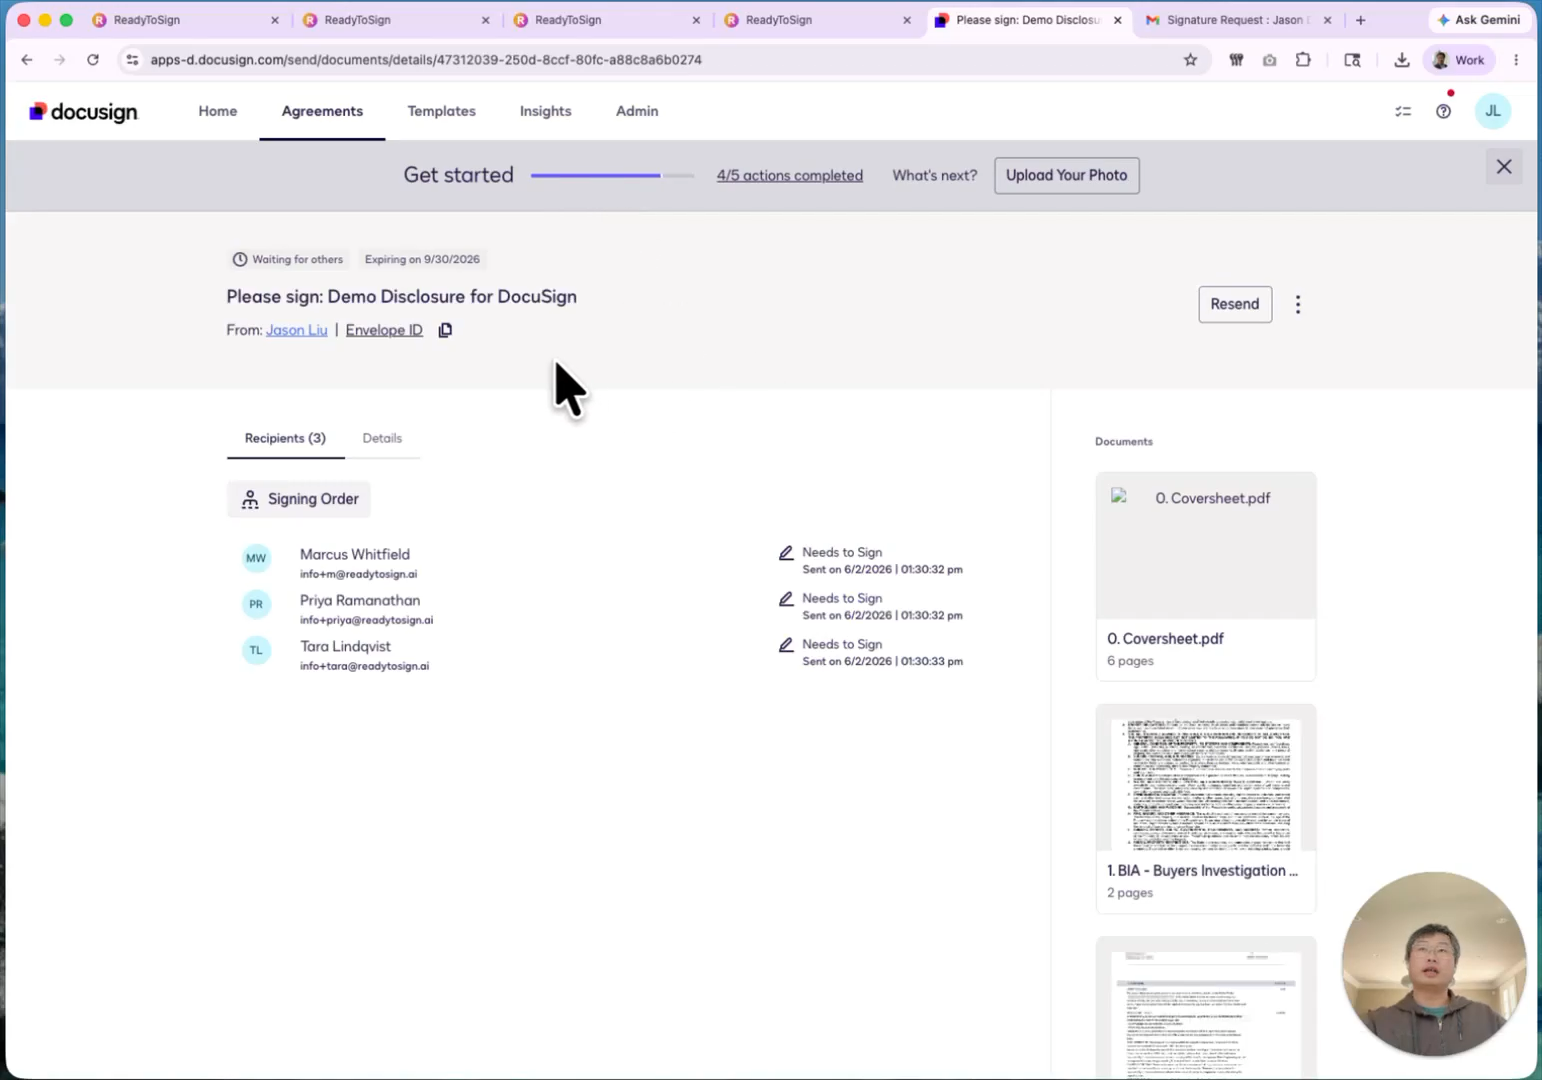
From DocuSign. Click Open in DocuSign to drop into your DocuSign envelope view. Useful if you’re already living in DocuSign for other transactions.
6. What recipients see
Recipients receive a signing email from DocuSign (not from ReadyToSign):
- Email subject reads “Jason sent a document for you to review.”
- They click Review document, which opens DocuSign’s signing UI.
- They sign in DocuSign’s smooth, familiar experience.
- When they finish, DocuSign reports the result back to ReadyToSign.
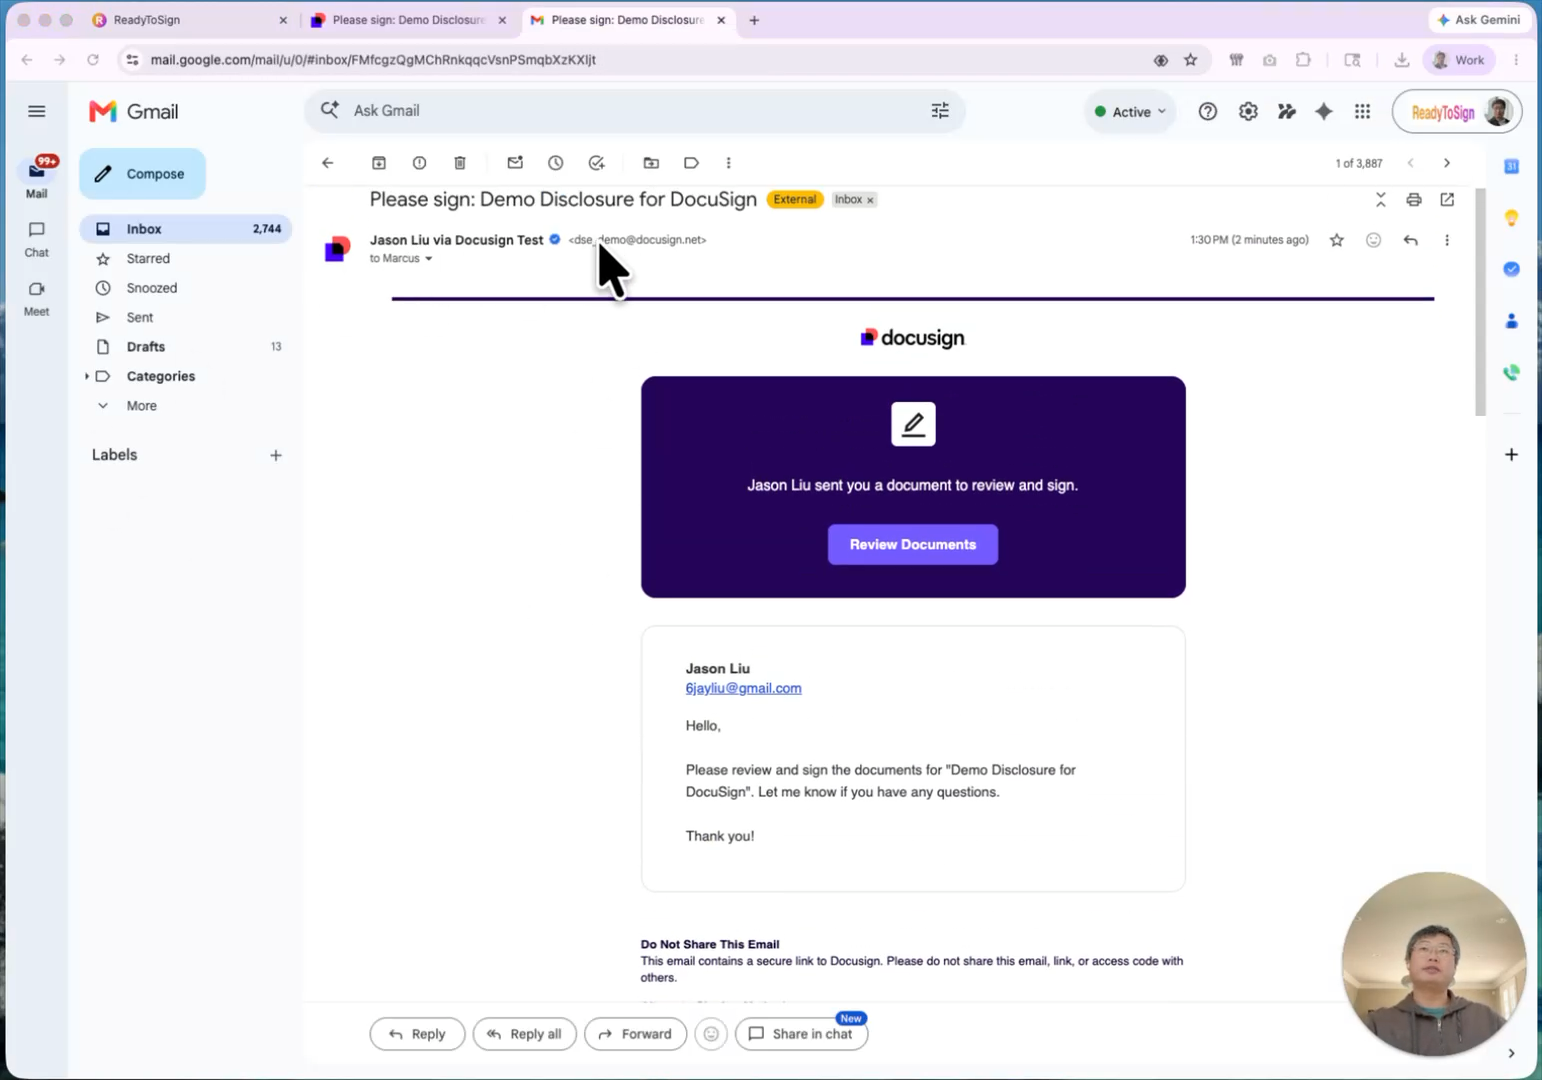
Everything they see is the standard DocuSign signing flow — no ReadyToSign branding on the signer side.
7. Download the signed package
Once everyone has signed, you can download from either app:
From ReadyToSign. Same two options as the BoldSign flow:
- Individual files (ZIP)
- Combined PDF
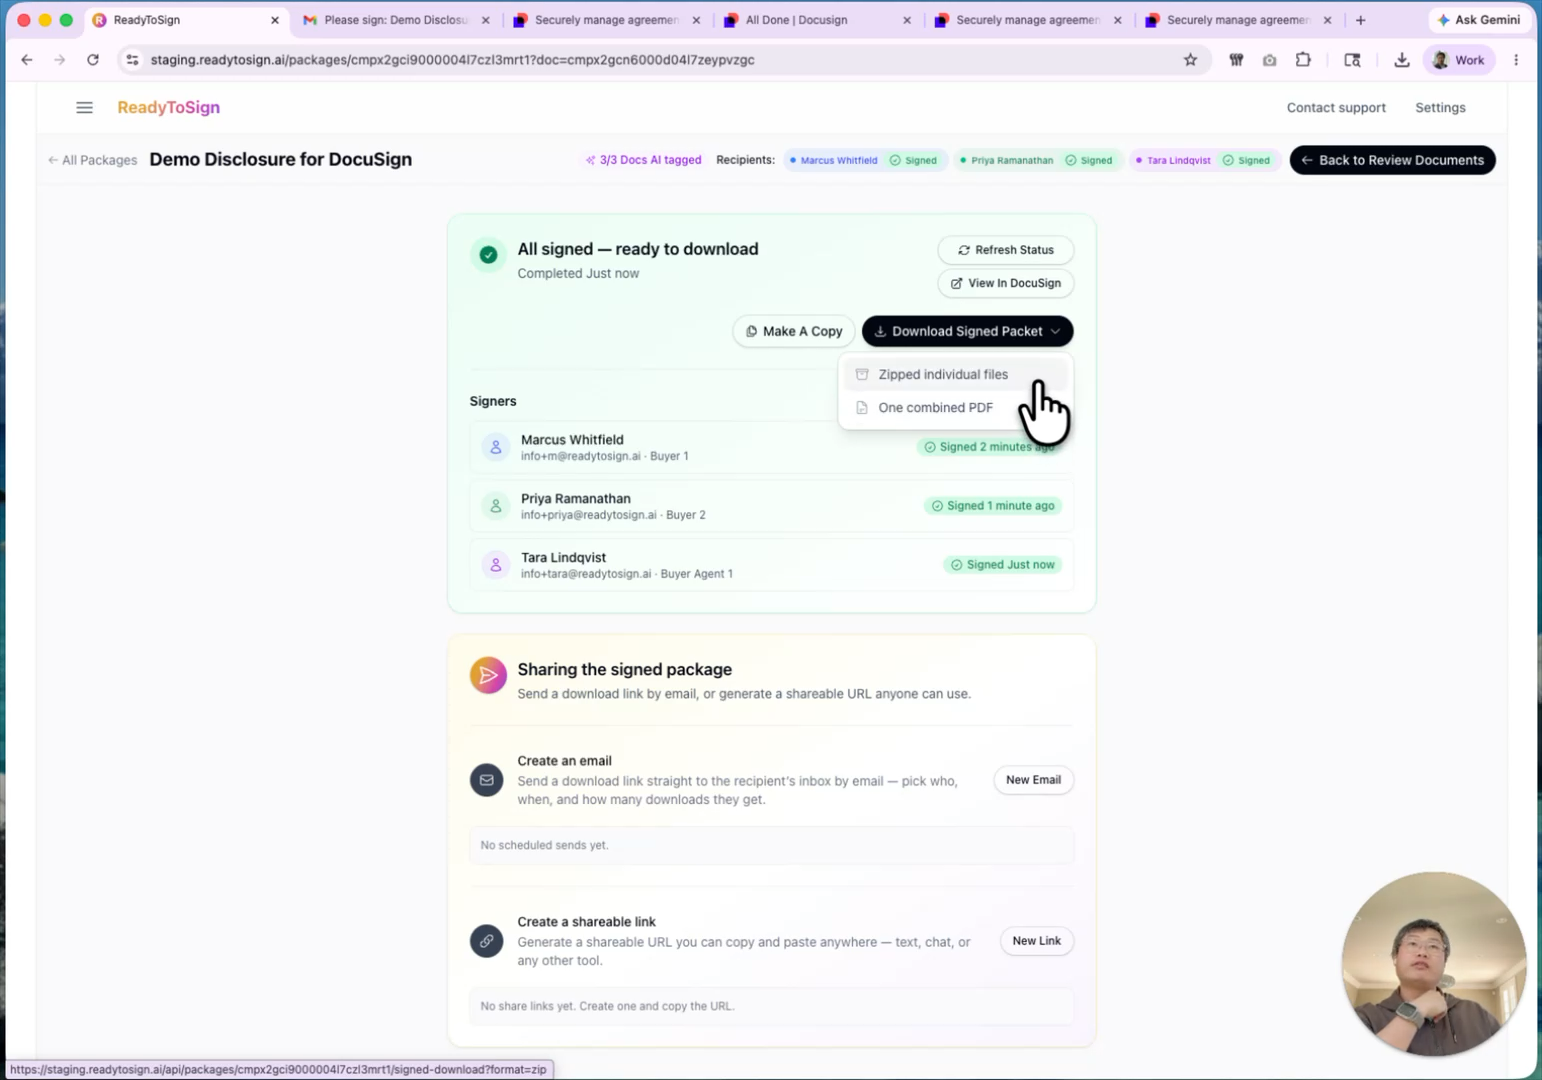
From DocuSign. Click Open in DocuSign and use DocuSign’s download options — including its own summary certificate. Useful if your brokerage requires DocuSign’s audit trail document.
8. Manage your DocuSign connection
To change which DocuSign account is linked, go to Settings.
You’ll see the current connection status. From there you can:
- Disconnect — removes the link to your current DocuSign account.
- Link DocuSign — connect a different existing account.
- Sign up for DocuSign — open the DocuSign trial signup pre-filled with your name and email, just like the first time.
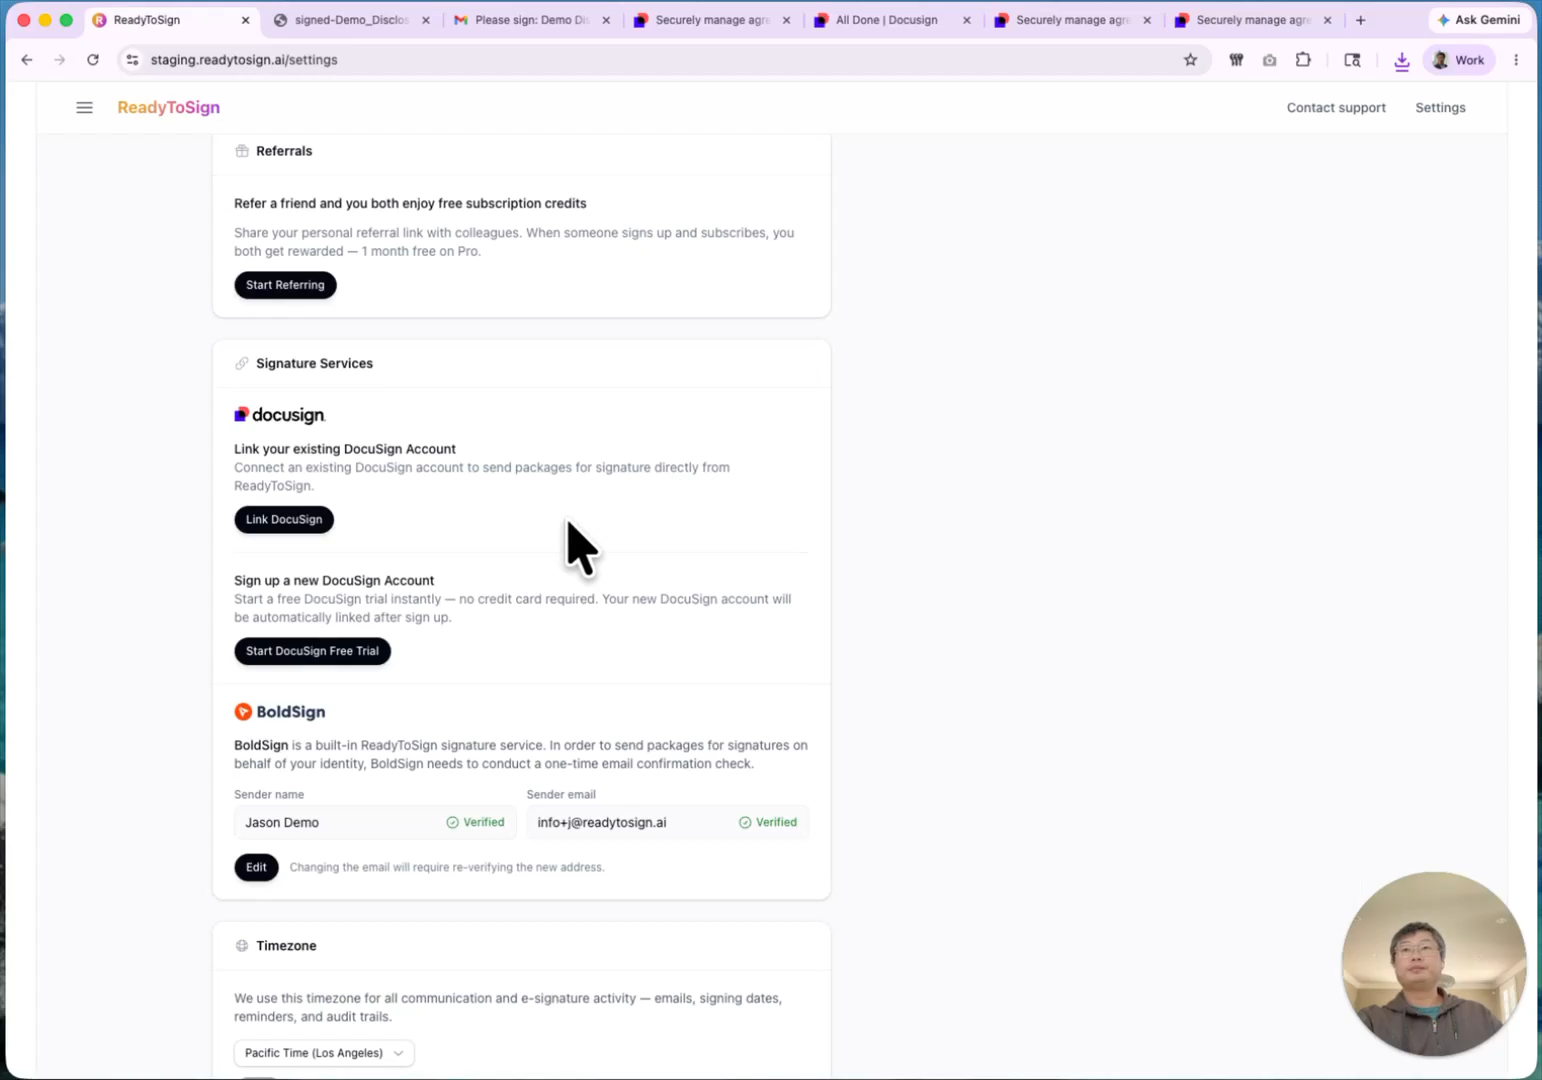
This is the place to go if you switch brokerages, change DocuSign accounts, or want to test on a different DocuSign environment.